Let’s start by getting the project up and running.
Get started
The repository, neo4j-graphacademy/llm-chatbot-python, has been created for this course. It contains any starter code and resources you need.
You can use a GitHub codespace as an online IDE and workspace for this course. It will automatically clone the course repository and set up your environment.
GitHub Codespaces
You will need to login with a GitHub account. The GitHub Codespaces free monthly usage will cover the duration of this course.
Develop on your local machine
You will need Python installed and the ability to install packages using pip.
You may want to set up a virtual environment using venv or virtualenv to keep your dependencies separate from other projects.
Clone the github.com/neo4j-graphacademy/llm-chatbot-python repository:
git clone https://github.com/neo4j-graphacademy/llm-chatbot-pythonFork the repository
You can fork the repository and have a copy for future reference.Install the required packages using pip:
cd llm-chatbot-python
pip install -r requirements.txt
You do not need to create a Neo4j database; you will use the provided sandbox instance.
Starting the App
Open the bot.py file containing the main application code.
bot.py
import streamlit as st
from utils import write_message

# Page Config
st.set_page_config("Ebert", page_icon=":movie_camera:")

# Set up Session State
if "messages" not in st.session_state:
    st.session_state.messages = [
        {"role": "assistant", "content": "Hi, I'm the GraphAcademy Chatbot!  How can I help you?"},
    ]

# Submit handler
def handle_submit(message):
    """
    Submit handler:

    You will modify this method to talk with an LLM and provide
    context using data from Neo4j.
    """

    # Handle the response
    with st.spinner('Thinking...'):
        # # TODO: Replace this with a call to your LLM
        from time import sleep
        sleep(1)
        write_message('assistant', message)


# Display messages in Session State
for message in st.session_state.messages:
    write_message(message['role'], message['content'], save=False)

# Handle any user input
if question := st.chat_input("What is up?"):
    # Display user message in chat message container
    write_message('user', question)

    # Generate a response
    handle_submit(question)
You can start the application using the streamlit run command.
streamlit run bot.pyStreamlit will start a server on http://localhost:8501.
Open the link to see the app running.

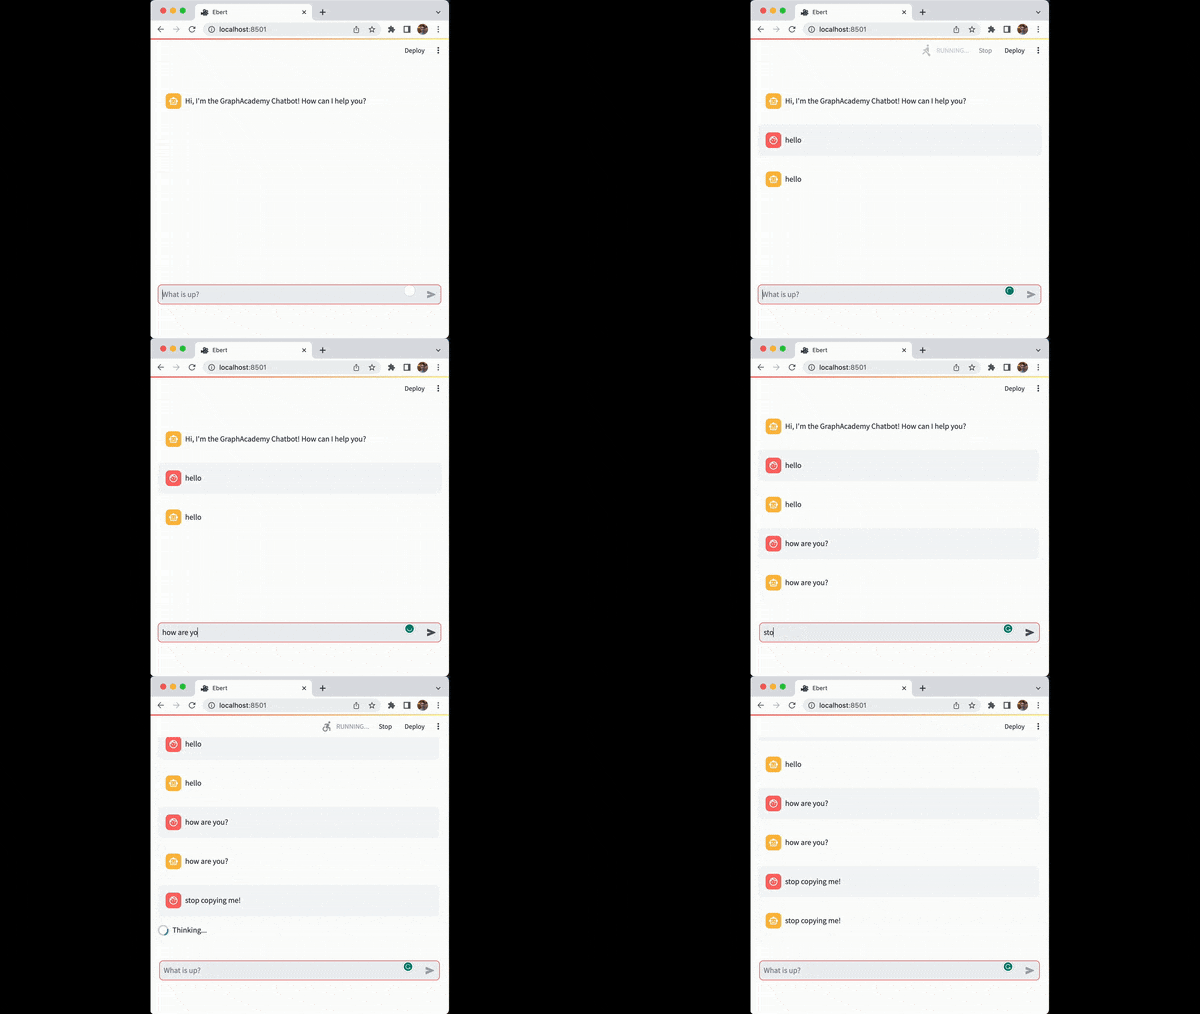
When you send a message, the app will display a red icon representing a user message. The app will wait for one second and then display the same message with an orange robot icon representing an assistant message.
Exploring bot.py
The code is as simple as possible so you can focus on the LLM integration.
Let’s take a look at bot.py in more detail.
Page Config
The code sets the st.set_page_config() to configure the title and icon used on the page.
# Page Config
st.set_page_config("Ebert", page_icon=":movie_camera:")
App Session State
The following code block checks the session state for the current user. The session saves the list of messages between the user and the LLM.
The code creates a default list of messages if the session is empty.
# Set up Session State
if "messages" not in st.session_state:
    st.session_state.messages = [
        {"role": "assistant", "content": "Hi, I'm the GraphAcademy Chatbot!  How can I help you?"},
    ]
The session state will persist for as long as the user keeps their browser tab open.
As the app state changes, certain sections of the UI may be re-rendered. Storing a list of messages to the session state ensures the app recreates the messages when the app its re-rendered.
Chat Messages
Within a container, any messages held in the session state are written to the screen using the write_message() helper function.
# Set up Session State
if "messages" not in st.session_state:
    st.session_state.messages = [
        {"role": "assistant", "content": "Hi, I'm the GraphAcademy Chatbot!  How can I help you?"},
    ]
The write_message() helper function has been abstracted into the utils.py file.
def write_message(role, content, save = True):
    """
    This is a helper function that saves a message to the
     session state and then writes a message to the UI
    """
    # Append to session state
    if save:
        st.session_state.messages.append({"role": role, "content": content})

    # Write to UI
    with st.chat_message(role):
        st.markdown(content)
The function accepts two positional arguments - the role of the author, either human or assistant, and the message.
You can pass an additional save parameter to instruct the function to append the message to the session state.
The block concludes by setting a question variable containing the user’s input.
When the user sends their message, the write_message() function saves the message to the session state and displays the message in the UI.
Handling Submissions
The handle_submit() mocks an interaction by sleeping for one second before repeating the user’s input.
def handle_submit(message):
    """
    Submit handler:

    You will modify this method to talk with an LLM and provide
    context using data from Neo4j.
    """

    # Handle the response
    with st.spinner('Thinking...'):
        # # TODO: Replace this with a call to your LLM
        from time import sleep
        sleep(1)
        write_message('assistant', message)
You will modify this function to add interactions with the LLM.
Check your understanding
Server Address
What Local URL would you use to view the Streamit app in your browser?
-
❏ http://localhost:1234
-
❏ http://localhost:7474
-
❏ http://localhost:7687
-
✓ http://localhost:8501
Hint
After running the streamlit run bot.py command, you should see an output similar to the following:
You can now view your Streamlit app in your browser.
Local URL: http://localhost:8501
Network URL: http://192.168.4.20:8501
The answer to this question is the Local URL written to the console.
Solution
The answer is http://localhost:8501.
Summary
In this lesson, you obtained a copy of the course code, installed the dependency and used the streamlit run command to start the app.
In the next module, you will start writing the code to interact with the LLM.